Juniper now deals with 530 customers worldwide
JMP/KYOTO/D/6777/C200
(NSN: 4235-99-464-5834)
SPECIFICATION
Trolley Size: (L) 3780mm x (W) 1020mm x (H) 1766mm Weight: (Dry) 668Kg
Dimensions of Kyoto mat: (L) 10668mm (35ft) x (W) 3658mm (12ft) x (Berm height) 102mm (4”)
Packing crate dimensions: (L) 3759mm x (W) 1118mm x (H) 1855mm
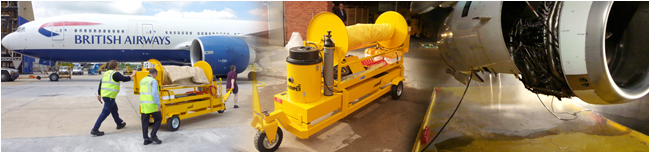
INTRODUCTION
The equipment consists of a KYOTO Containment Mat 12ft wide x 35ft long with 4” diameter sides (berms) into which foam tubes are inserted to form a raised edge to the mat. An alternative inflatable version of the mat is also available. The mat is manufactured from a polyurethane material which is resistant to a wide range of chemicals including Skydrol.
A 12V DC motorised hose reel is provided to conveniently store and dispense the mat and the reel is mounted on an 87 gallon stainless steel tank which in turn is fitted on a rigid steel chassis. The chassis is supported by three heavy duty wheels with 16” super elastic tyres, one of which is mounted on a heavy duty steering castor wheel. A drawbar, which can be locked in the upright position for storage and safety, is attached to the steering castor unit. A drawbar operated parking brake acts on the front wheel when the drawbar is locked in the upright position.
A vacuum unit which has a 36V vacuum motor head is powered by three 12V batteries. The batteries are stored in plastic containers which are mounted on top of the tank underneath the reel. An automatic charger is supplied with the rig to connect the batteries with an external power supply of 220V AC when the batteries require a recharge.
If using the alternative inflatable version of the mat, a system for inflating the side walls (berms) is conveniently mounted on the front of the trolley consisting of a re-chargeable nitrogen cylinder, a pre-set HP regulator, on/off ball valve and a 15ft hose with Schrader connector.
A vacuum floor tool for collecting the waste water from the mat is stored on top of the tank. The vacuum floor tool connects to the vacuum unit via a flexible hose and when switched on sucks the waste water from the containment mat into the 87 gallon tank. A 3⁄4” BSP drain ball valve is fitted on the back of the tank to empty the waste material into the designated collection tank/area were filtration is available.
OPERATION
Position the trolley approximately 20ft away from the exhaust of the engine being washed and at right angles to the engine. Apply the brake by locking the tow bar in the upright position. Unwind the mat from the top of the hose reel toward the rear of the engine and detach the three velcro straps from the hose reel (a minimum of two persons required, one on each side of the mat). When fully extended, open the mat out to its full width.
Re-position the trolley at a safe distance to one side of the engine exhaust. Then prepare the mat.
Insert the foam tubes into the mat sidewalls, or if using the alternative inflatable mat, uncoil the inflation hose and attach the hose end fitting to the inflation valve on the mat ensuring that the valve on the fitting is fully attached. Open nitrogen inlet valve to inflate the sides of the mat. When the sides are fully inflated the safety valve on the mat blows off. Close the valve, disconnect the hose fitting and re-stow on the rig.
When the engine preparation has been completed, re-position the mat centrally under the engine to ensure all waste water will be collected, fold the protective flaps over the sidewall openings and anchor with with the supplied weights. The mat is normally positioned with the leading edge 3-4 feet back from the front of the engine cowl.
AFTER THE WASH
Switch on the vacuum unit ensuring all three switches are in the ‘on’ position and use the vacuum floor tool to suck up the liquid from inside the collection mat. Once all the waste water has been vacuumed into the tank remove the foam tubes and fold in the mat sides, or if using the alternative inflatable mat, unscrew the protective cap on the large inflation valve which is positioned adjacent to the valve used to inflate the sides (berms) and use the supplied squeegee to help force the air along the berms towards the valve, then move the trolley to the original position. Connect the velcro straps to the reel and rewind over (not under) the reel using the push button on the control panel to operate and control the speed.
